5.21.2010

May's Lemon Poppy Seed Cake... with almond frosting!

So it's that time again. Cake time! This month's cake was a Lemon Poppy Seed with Almond Frosting. (Sidenote: last month's was banana cake with chocolate frosting. It was amazing. I have not blogged about it. I've been busy. Forgive me for a lack of timeline synchronicity that will soon occur. Is that a word? Don't think so.)

Since I'm still doing this whole quest of quasi Veganism - no wheat, meat or dairy - I was a little perplexed about how exactly to approach this cake. What followed was an adventure in substitutions and super market shopping. I'm pretty sure I should apologize to any one who was at the store around 10pm for my delirious, hysterical cell phone conversations with my mother was we tried to determine how the heck cake flour differed from all purpose flour. Apparently, it is not only lighter and airier or whatever, but it has the lowest gluten content of any wheat flours. Yay!

[Side note #2: I'll update on the status of my personal culinary and diet exploits in the near future. I know I promised to do that sooner. Bah. In brief, it's been almost 7 weeks and I feel fantastic. Digestive peace is attainable!]

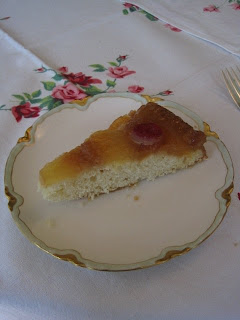
In summary, this cake was delish. It was light weight, I'd assume from the 3 egg whites stirred in at the end. The lemon (picked fresh from our tree!) was refreshing and added a nice, bright flavor. I ended up halving the recipe, and baking it in cupcake sizes for easier distribution to willing tasters. I substituted soy milk for the buttermilk, mixing it with a scant tablespoon of lemon juice and letting it sit, stirring occasionally, for about 10 minutes.

The almond frosting, well... I'm pretty proud of this one, folks. I made a VEGAN cream cheese frosting. I used earth balance in place of the butter, and tofutti in place of the cream cheese. It was really, really sugary, so I could handle too much, but as I love the flavor of almond extract, I thought it was quite nice. I think next time I'd cut back on the powdered sugar a bit, and maybe add a little more almond, or some other flavor (lemon, vanilla) to brighten things up.

Sorry about the lack of pictures. Because these cupcakes were freaking beautiful. So beautiful that my camera died and my computer refused to upload from the chip. Bah. I actually busted out a piping bag, and then artfully placed sliced almonds on top of each cupcake. If I can salvage a picture, I'll stick it up here later.

This would be a great cake for a brunch or luncheon with a group of ladies... give it a try! Assuming you attend brunches and luncheons or things of that nature. I don't. But if you do, goodonya.

Oh yeah, and this cake was from Sky High Cakes. Credit where credit is due, and all.

Here's a link to the recipe, as it is in the book:

4.06.2010

7 Days of Spring Cleaning

It's officially spring time, folks. And with that comes... SPRING CLEANING!

So I'm going to tell you a little tale, starting about 9 months ago, when I graduated from UC San Diego and moved "North". My reasons were varied; mostly, I was ready for a change of scenery, cheaper rent, and of course to flee back to the warm comfort of the nest and avoid the cold harsh realities of a post-graduate economic-pitfall kind of world. I'll mostly skip what happens the next few months, suffice it to say I managed to avoid unpacking hardly anything except what was absolutely necessary (again, varied reasons, too psychologically rooted to bear on the ultimate point of this entry, whatever that may be).

Fast forward to two weeks ago. Grandma was coming to visit. Grandma needed a place to sleep. I unpacked and cleaned. Ta-da! Miracles do happen my friends.

Now, having cleaned up that part of my life, I've decided to do a Springtime Detox of my body as well. It's been a long rainy winter up here. And I work someplace where cookies the size of your face are readily available. I'm feeling worn down and fatigued, and I'm ready to feel different. So, yesterday began my 7-day Spring Detox. For the next 7 days, the following rules apply:

- No wheat
- No meat
- No dairy
- No booze
- No unnecessary sugary things that magically haven't been eliminated by the above categories

I figure you can do anything for about 7 days, right? And knowing myself, I need a specific set of rules and guidelines to follow if I want any results to show up (exhibit a: the last four times I've tried to eat differently). I reserve the right to extend this if I start suddenly feeling fabulous and svelte at the end of one week.

I started yesterday, and so far it's going pretty well. I have a feeling the intense "give me sugar and junk food in my face noooooow" cravings will kick in tomorrow, but hopefully not. I'm helped along by the fact that several of my family members, chiefly my dad Tim and stepmommy Vicki, have dabbled in many various dieting trends, most recently a raw, gluten-free and vegan-esque diet involving a high-powered juicer. In any case, I'm somewhat aware to the different options that exist for me. And yeah, lots of people have already asked "oh my gooooosh what are you going to eeeeaaat, vegetables??"

I've been eating pretty well so far. Yummy smoothies, brown rice, oatmeal, broccoli, and tonight I made a massive pot of Escarole and White Bean soup (recipe to come, pending permission from the folks who originated it and who are currently working diligently towards cookbook publication, and who could throw me out of the next family gathering if they so choose--hint, hint.)

I'll keep you posted, oh ye of the internet mists. This is yet another built-in accountability method for myself, of course. And it's slightly indulgent. In a low fat, low carb, totally-in-line-with-my-rules kind of way. Yay.

4.05.2010

Basic Bruschetta

My mother and I celebrated a lovely Easter at a family friend's house, complete with egg dye-ing, good wine, excellent food, great company and a pretty random spring storm. This may be the first Easter I've spent in the midst of a massive April shower... Although to me, Easter should always be windy and slightly cloudy (comes from spending so many Easter's at the farm in Kansas.)

Anyway, we were asked if we could bring along some wine and an appetizer, so I coached my sous-chef Mom into helping me throw together some basic tomato bruschetta. For those who don't know, bruschetta can come in many shapes or forms, and can also be mis-pronounced in about four different ways (it's supposed to be something bru-sKET-uh, but even with 8 years of Italian I still mash out the word broo-shedDUH in my best American voice possible.) I've tried a ricotta-tomato one, a surprisingly delicious chicken-liver concoction in Florence, and about everything in between. But far and away a simple tomato and basil combo is my favorite. I think I started with something by Mario Batali, but kinda went off on my own direction with it. You can find a million different variations on the same thing; I'll just credit the Italian population of the world as a whole. Find one you like and make it your own!

Basic Bruschetta

You will need:
Some tomatoes (we used about 5, the clustery-vine type)
Some fresh basil, cut into thin strips (6 leaves? I dunno, eyeball it)
About 1/4 cup or less good olive oil (I use Colavita extra-virgin)
1 clove or so of garlic, mashed up in your garlic masher device (or just minced)
Black Pepper and Salt, to taste (skimping not necessary)
Dash Balsamic Vinegar (if you want)

And then you will do this:
Chop up those tomatoes! I cored and seeded mine, but if you don't mind the mushier texture, then do as you please. After chopping all those babies up, whisk together your garlic, olive oil, salt and pepper. Dump it in with the tomatoes, mix, and then throw in the basil. I threw a dash of balsamic vinegar on top, which accidentally became about 10 dashes, and had to drain some out. In the end, you couldn't taste it much, but I adore the stuff and include it wherever possible.

Meanwhile, have your mother or whoever your assistant may be, thinly slice up a baguette. Throw the slices under the broiler for a few minutes on each side (or just one if you're lazy). While they're still warm but cool enough to handle, rub each piece with some raw garlic. That's right, just lop a clove in half and rub it straight on that hot bread-y goodness. It really whams up the intensity of the bruschetta. If you don't want to mess with all this, just buy some good crackers, and add a bit more garlic to the bruschetta so you get a nice hit of bad breath to share with everyone later. They'll thank you for it, I promise.

3.30.2010

An Upside Down Success!

Let's be frank, friends. January was a disaster. And honestly I needed a month to recuperate. Alright, maybe it was more than a month. Maybe it was a couple plus a few days...but who's counting right? Right??

So, my baking confidence shattered, my will to create in utter disarray, and my sweet tooth feeling too ashamed to go on, I approached this month's cake for The Cake Slice Bakers with a bit of apprehension. Pineapple Upside Down Cake... I couldn't handle velvet, so how was I gonna handle something that wasn't even right side up?!

Help. Help was needed. And it came in the form of my wonderful baby sister, home from college for spring break and feeling a little kitchen deprived in any case. And then pile onto that help some advice from mom and grandma, and we were in business. (Did I mention it felt like my ENTIRE FAMILY was always around this week? A little different than time with just me and the Newf.) Grandma and Mom lent their "southern wisdom" (they did live in Savannah once, after all) and helped me scout out the ancient cast iron skillet, which has done nothing but take up space in our under-stove drawer and make it impossible to move due to the 40 pounds of cast iron heft therein.

Anyway. I tackled the topping, which involves layering butter, brown sugar and pineapple into the skillet.

You then dump the incredibly thick cake batter lovingly prepared by your sister over the top...

Mush it around a bit...

Put it in the oven, throw your hands up to the high heavens, and hope it comes out looking something like this!

Comprehend the miracle that has happened, take a deep breath, and savor the moment. (And maybe poke your cake a little to make sure it's done.)

Then comes the tricky part... loosening the darn thing from the 50 pound skillet. I pounded and rapped on the back side and eventually it fell out, and glory be this is what it looked like!


And yeah, that is me in the background, scraping out the rest of the brown sugar topping with my fingers. And mushing a little onto the holes in the cake (my hands were clean). And then of course eating the rest of the gooey brown sugar left in the pan. What a heathen I am. I won't post the picture of me caught in the act, but I'm sure you can imagine.

Anyway, I nervously awaited taste testing until the next day, when I hauled the cake to a girls' lunch with the family and some friends. We got to put it on their lovely china and lovely linens.


All in all, I'll agree with some of our other cake slicers... This was a very dense cake. But it was plenty moist, rather lovely to look at, and tasted pretty darn good. I had seconds. Maybe thirds later. Maybe I lost count after that... Maybe don't tell on me? With two people, this cake came together really quickly, and without much fuss or clean up even. Definitely one I would make again, should the need arise. And if you're not sold on what I have to say, visit the other cake slice bakers for a second opinion.

[Photographs for this entry were graciously provided by my sissy and her nikon. She saved my butt x2 apparently... Talk about personal creativity being at a low! Thanks sistah!]


Pineapple Upside Down Cake from Southern Cakes (by Nancie McDermott)

Pineapple Topping:

  • One 20-ounce can pineapple rings (save the juice)
  • 4 Tbsp butter
  • 2/3 cup firmly packed brown sugar
  • 10 maraschino cherries

Cake:

  • 1 1/2 cups all purpose flour
  • 3/4 cup sugar
  • 1 1/2 tsp baking powder
  • 1/2 salt
  • 1/2 cup milk
  • 4 Tbsp butter, softened
  • 1 egg
  • 1 tsp vanilla extract
  • 2 Tbsp. pineapple juice

Heat the oven to 350F.

Drain the pineapple well but save 2 tablespoons of the juice for the cake batter. Melt the butter in a 10 inch cast iron skillet over medium heat. Or, put the butter in a 9 inch round cake pan and put it in the oven for a few minutes as the heat melts the butter.

Remove the pan from the oven or stove and sprinkle the brown sugar over the buttery surface. Place the pineapple rings carefully on top of the scattered brown sugar and melted butter, arranging them so they fit in 1 layer. (You may have a few left over). Place a cherry in the center of each ring, and set the pan aside.

In a large mixing bowl, combine the flour, sugar, baking powder and salt. Use a fork to mix them together well. Add the milk and butter and beat well with a mixer, scraping down the bowl once or twice until you have a thick, fairly smooth batter, about 1 to 2 minutes.

Add the egg, reserved pineapple juice and the vanilla. Beat for 2 minutes more, stopping once or twice to scrape down the sides.

Carefully pour the batter over the pineapple arranged in the skillet or cake pan and use a spoon to spread it evenly to the edges of the pan. Bake for 35 to 40 minutes until the cake is golden brown and springs back when touched lightly in the center. Cool in the skillet or pan for 5 minutes on a wire rack.

With oven mitts, carefully turn out the warm cake onto a serving plate by placing the plate upside down over the cake in the pan and then flipping them over together to release the cake onto the plate. Serve warm or at room temperature.

1.20.2010

A Red Velvet Disaster.

Well, I've done it. I had my first unmitigated baking catastrophe. Alright, maybe I'm exaggerating, but the number of royal flubs I made on a recipe that was supposed to be *relatively* simple is pretty impressive. It would be beating a dead horse to list them all; suffice it to say, I chose to procrastinate this cake, tried to magically make it happen in about 30 minutes, stuck the batter in the fridge when life reminded me it wouldn't pause time for cake-ery, and improperly greased my pan (which was a poor choice to begin with anyways).

In the end, I got red velvet discs and hunks. Fluffy, crumbly, moist and tender hunks of deep red cake, coupled with equally delicious red discs. That while delicious, were completely unpresentable for any general member of the public who wasn't a drunk college student.

Mini Bundts: FAIL.

Round 2, Cupcakes: It's not looking good...

This is a cake-top separated from its cake-body. Also Fail.

End Result. Yeah... Fail.

But please, dear friends, don't let this deter you from your own baking attempts. This was the January Cake for The Cake Slice Bakers from Nancie McDermott's Southern Cakes. Some of them have put together lovely creations which you should look at and drool over and maybe try yourself. This, however, was not my turn. And I refuse to let this ruin my reputation as the meanest cupcake baker this side of my street.

[Note: No, I didn't even bother to make the frosting. Also, I used a whole bottle of red gel food coloring. American = excess, remember?]